
Thanks and best wishes,
– Stephan
Setting up your vendor account • Preparing your new library • Submitting your finished product • Updating your published product
1. Your Vendor Account
- Log into your Sound Designer Dashboard from the Account link in the top-right corner of the landing page or jump in right here.
Enter your username/email and password. - Notice the blue cogwheel on the right in the main navigation and the blue sub-menu below the header (if you don’t see the cogwheel, your account is not set up as a vendor account).
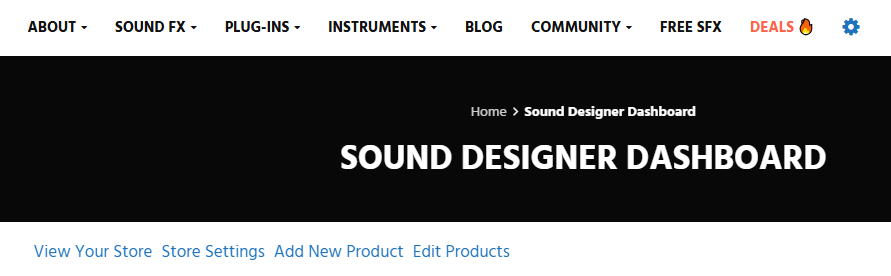
- Click on Store Settings and update the required information.
Paypal and bank account
Your Paypal email address you would like to receive payments on. We also highly recommend you set up your Vendor Account payout details (we recommend wise.com for the lowest fees), at your vendor payout page.Shop Name
This is your public brand customers will search for.
IMPORTANT! Please use the same name for your Shop that will later be used for your download files. More on this below.Shop Description
Only needs to be set up once. Enter your company description/your bio, providing more background info than in the Seller Info box. You can also add media related to your work as a Sound Library Vendor. - Click Save, and inspect your shop from the Sound Designer Dashboard. Your Shop page is also visible to all users, on all your products, when clicking the Licensor-link.
2. Preparing your new library
2.1 General requirements
When you create a new library to be published on A Sound Effect, please note the following things:
- The better the library content is documented, the higher the sales opportunities. This means that you should give your files descriptive names which on the one hand should not be too long but on the other hand not too short. Please invest time at this step, as it will pay off.
- Inject metadata according to the various standards (BWF, Soundminer, UCS).
- Create a spreadsheet of the metadata, both in XLSX and in PDF format (you will need that later).
- Name the XLSX/PDF according to this scheme, depending on if your library is UCS compliant or not:
“Vendor_name_Library_name_UCS.pdf” or “Vendor_name_Library_name_nonUCS.pdf”
- Prepare a square product image with a size of at least 700×700 px, max. 95% JPG
2.2 How to prepare your download files
Important: From now on we can no longer accept rar files!
- Please note that we do not accept download links to un-zipped folders or even just a bunch of loose files.
- We only accept release-ready ZIP files.
- If a ZIP file tends to get bigger than 4GB, please re-pack them to several independent ZIP files.
- Please do not create consecutive ZIP files. Each ZIP file must be able to be unpacked independently of the others.
Test it locally before submitting. - Make sure that the 1st of your ZIP files contains the metadata-spreadsheet in XLSX + PDF format.
2.3 Naming convention
Your ZIP file name must contain a minimum set of information like in the examples below:
“Vendor_name_Library_name_UCS.zip” for libraries with UCS compliant files,
“Vendor_name_Library_name_nonUCS.zip” for libraries with non-UCS compliant files.
If several consecutive files are required due to the size of your library, a counter must be appended:
“Vendor_name_Library_name_UCS_01of10.zip”
If you need to apply a release number please insert it between Vendor_name and Library_name
In any case fill the blanks with underscores only!
3. Submitting your finished product
3.1 How to create a new product
- Log into your account and select Add New Product from the blue sub-menu

- Field: Product Name
Enter the name of your library. Important: Please do not use all caps, “X sound library”, or stuff with keywords – title only, please - Box: Product Description
This is where your tracklist (metadata.pdf) goes.
Please make sure that the edit window is set to TEXT, do not use the Visual option!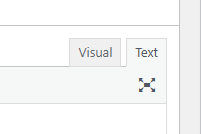
Please do not paste external links to your metadata sheet.
Please do not use this box for your library description!
Step 1:
Paste the snippet from the box below into the Product Description box and update the bold text (between the quotation marks) with your information:[fs t="The name of your library (without the word “library”)"] [embeddoc url="replace with link to the Metadata sheet of your library in pdf-format" viewer="google" ]
3.2 How to create the PDF metadata link
1. Click on Add Media (opens an overlay window).
2. Click on Upload Files, then on Select Files and upload the already prepared pdf-file.
3. Once the upload has finished (should only take a couple of seconds) click on Copy URL to clipboard (right side of the floating window). Please do not click on “Insert into product”!
4. Close the floating window, and paste the PDF-link in a new browser window to check if it is working.
5. If it works, insert the PDF link into the snippet.
Step 2:
Copy the snippet below, paste it below the first snippet and just leave it there!
We will update the placeholders with your library’s WAV filenames during the approval process.[jaccordion size="xsmall" theme="smoothness" active="0"] Click to view the full sound list for this SFX library:: xxx.wav xxx.wav xxx.wav [/jaccordion]
- 3.3.1 Box: Library Specs
Field: Enter your Soundcloud Track ID (numbers only)
There are two possible ways to provide the demo.A: If you want to insert just a single track
Go to your Soundcloud account and pick up the desired track.
Click on Share.
Select Embed in the pop-up window.
Choose the middle layout.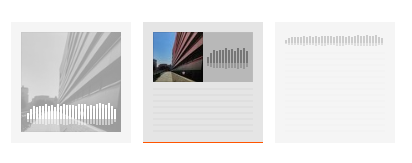
Click in the Code window below to select the entire embed code.
Paste this code (pretty long) into a plain text document.
Select only the numbers behind “…..tracks/”
Copy and paste this number into the Soundcloud Track ID window.
In the Enter the FULL embed shortcode window click on …generate it from the ID
Make sure a similar embed code like in the example below is generated.
B: If you want to insert a playlist
First make sure that you already have inserted the track ID of the first track of your playlist like described in step A.
Skip the last step “click on …generate it from the ID“!Then go to your Soundcloud account and pick up the desired playlist.
Click on Share.
Select Embed in the pop-up window.
Choose the middle layout.
Click in the Code window below to select the entire embed code.
Paste this code (pretty long) into the Enter the FULL embed shortcode field.
Delete everything(!) behind the </iframe> closing tag.
Please do not click “generate it from the ID”!
Fill out all the remaining fields in the Library Specs box. They are pretty self-explanatory.Catchy library tagline can be left out, if you don’t have any. In case you use it, please do not write more than 5 short and descriptive words. Never paste your entire product description here!
3.3 Soundcloud Demo
Please note: A Soundcloud demo is mandatory!
- 3.3.2 Box: Product Data (Simple Product)
In the General tab please mark both the Virtual & the Downloadable checkboxes.
Set your regular price for the library. The price is ex VAT and in USD (currency conversions and VAT application happen automatically per visitor).
Please note that the minimum price for a library is $5.00.Click on schedule if you want to make an intro sale.
Leave the “FROM” field empty, the sale will start automatically as soon as we publish the product.
Click into the “TO”-field and set an end date (max. 2 weeks). During the approval process we will adjust this date according to the actual release date.
- 3.3.3 Field: Downloadable Files
Click on Add File and paste the file name plus a download link to your library file.
The file link must be from any of the common file transfer services like Google, Dropbox, Wetransfer or similar. Please do not use exotic providers because they often have limited download speeds. Make sure that the download link is set to “public”!
If you have prepared several download files click on Add File again and enter the information.
During the approval process we will download these files and host them on our servers.
IMPORTANT: Please DO NOT upload any library files directly (i.e. DO NOT click Choose file)!
- Set Download limit to “3” and Download expiry to “2”
- Set Tax status to “Taxable”
- Set Tax class to “Standard”
- 3.3.4 Variable Products
If you want to offer a product with variations at different prices – e.g. a Surround version and a Stereo version of your library – please create a single product and attach the download files as described above. Send us an email with pricing information for each variation and we will set everything up for you.
Please do not create one product per variation!
- 3.3.5 Box: Product Short Description
Enter your full product description here. This is where you showcase your library and pique the interest of potential buyers. So be sure to write an enticing text that highlights the benefits of your library, but avoid extremely long texts as it may distract customers from actually buying your library.
IMPORTANT:
Do not use unnecessary or wrong html tags. Always check if they get rendered properly by our site!
Please stay objective, and be careful with superlatives. Do not use exclamation marks unless you have to point out something really unique.
Please do not use hyperbole like “GREATER THAN EVER!!!”, “AAA quality sound files” etc, or promote links to your own webshop or site.
- 3.3.6 Bonus tips for your product description
If you want to add a Youtube or Vimeo video you don’t need an embed code for that.
Simply paste in the video link, exactly as it appears in your browser, and it will be automatically embedded.
For example, your Youtube or Vimeo links could look like this:https://www.youtube.com/watch?v=s9APLXM9Ei8
https://vimeo.com/338341878
Replace with your own URLs, of course.
- 3.3.7 Box: Product Category
In the box on the right select the product category that best fits the scope of your library.
Please do not select more than 4 categories as this will clutter the search system for your potential customers. - 3.3.8 Box: Product Tags
Enter up to 10 comma-separated product tags that describe your library or select from the most used tags below. Only use simple tags, and do not use generic tags such as “sound effects”, “sound library” etc. - 3.3.9 Box: Product Image
Click on “Set product image” and select your image (Upload Files -> Select Files).
Once the image has been uploaded click on the blue “Set product image” button at the right bottom corner of the floating window. - 3.3.10 Box: Publish
You can click “Save Draft” at any time during the product creation process and “Preview” your product page.
Tip: Right-click or Shift-click to open the preview in a new tab.
If you are satisfied with your preview and have diligently completed all the steps outlined in this guide,
click “Submit for Review” and Congrats! – you´re done! 🎉
4. Updating your published product
If you want to update your already published products please note the following hints:
- First, make sure to set your product status back to Draft!
Now the product is hidden from the shop and it can not be purchased while you are editing. - Make all desired updates on your product.
- There is one important exception though:
Please do not delete the download name and download link under any circumstances
If you want to update your download files please send us an email with the new link and we will then update the product. - When you have finished all the changes, check the Preview.
- If everything looks alright change the status back to Pending Review
We will then have another look and re-publish the product as soon as possible. - If you are unsure about changes to your product, please email us beforehand.