DIY microphone Asbjoern Andersen


Sound designer and field recordist Pasi Pitkänen recently embarked on a quest to build a DIY ORTF stereo mic with very low self-noise - here's how he did it:
Interview by Anne-Sophie Mongeau, photos courtesy of Pasi Pitkänen
Please share:
SoundMorph Halloween Sale 2025
 

Hi Pasi, thanks for doing this interview! First, can you introduce yourself and your work?

Hey all, thanks for having me here! For over a decade I have been involved in audio as a sound designer, field recordist and a sound effect library developer. Throughout the years I have gathered solid knowledge in planning, recording, processing and designing top-notch audio content for games and other media. Currently, I work as Head of Audio at Rovio Entertainment Corporation where I manage a team of seven audio professionals. In my free time I create and publish sound effect libraries and try to experiment with audio as much as possible.
 

Why did you want to create a DIY Rode NT1 ORTF stereo setup? Did you have a specific need behind it? What do you use it the most for?

I think it was about two years ago when I stumbled across a DIY Perks video on YouTube and there, this guy had made himself a super low-noise microphone. When I saw that video I instantly wanted to do my own take on that and contacted a friend of mine who is basically a universal genius, so I knew he could help me with this and do a great job at it!


The Ultimate DIY Microphone (super low self-noise!)


The DIY Perks video that inspired Pasi to start his own microphone project

I love recording ambiences and sound designing them as well so I have become quite nitpicky on self-noise and the quality of the source material that I use. I wanted to have this super low self-noise ORTF setup that I can take to my field recording trips and get really clean recordings without the need to do too much noise reduction on the material.

I have been using this setup to record really quiet room tones and ambiences. I plan to record more in the future of course and maybe even focus more on the room tones side.

Here is a rough list of the process that we took while making this microphone setup:

Specification received from Pasi:
– 17cm distance for microphone capsules
– Angle between capsules 110′
– Maximum 00 for the mechanics 60mm

Disassemble Rode NTI -A microphones
– Measure and 3D model capsule and PCB

Use 50 mm standard aluminum tube as a starting point for the mechanics
 

FIRST PROTO (proof-of-concept)

In 3D model:
– Place capsules and PCB’s inside of the pipe in desired locations
– Design brackets for the capsules
– Design spine mechanic for the whole microphone
– Design main pipe and space reservation for meshes

Try to find readymade mesh grille without success
– Fold first ones by hand from steel mesh
– Inner meshes are made from tea strainer meshes

Use standard 60mm pipe parts as outer mechanics
– Meshes are attached with metal screw-on hose clamps

Spine is made from 3mm aluminum sheet
– PCB’s are fixed with screws and nuts with spacers

Capsule holders are 3D printed in local university workshop
– Poor quality

5-pin standard size XLR connector is used on end of a 50cm cable


SECOND PROTO

Use learnings from first prototype to revise the 3D models

*Redesign
*Only thing to remain is SOmm standard tube as a base for mesh sub-assembly

– Capsule holders
– Spine
– Main pipe
– Meshes and their fixing

Have pipe mechanics milled in lathe

Mill and solder spine mechanics
– Only screws are needed for fixing, necessary spacings are milled

New capsule holders are ordered from commercial supplier
– Much better quality

Source and purchase aluminum and stainless mesh for grilles

Design and manufacture press tooling to press mesh grilles
– Hone the pressing process
– 5-pin MiniXLR panel connector is used, which is installed in main
pipe
– 5-pin MiniXLR to standard S-pin XLR cable is outsourced

Study and build aluminum anodizing process
– Fail miserably and paint parts

Assemble parts with heat fitments, screws and epoxy
– Find out that painted meshes and epoxy won’t let galvanic connection to be formed between meshes and main rest of the mechanics (this causes audible hum in recording)

Fix
– Remove glued meshes
– Make new ones
– Clean surfaces
– Use revised gluing technique
– Reassemble microphone

Finished (For now…)


Pasi’s DIY ORTF stereo mic
How does your DIY setup compare to commercial alternatives?

I didn’t do too much research or comparison on what is out there but of course I knew the basic setups that people have been using for field recording. I found most of them to be impractical for my use and some of them were just either too heavy or too pricey. I think that my DIY setup is one of quietest ones out there since its using the great Røde NT1 (black model) capsules which have 4.5dB self-noise. Of course we can debate on the sound quality of the capsules and how they compare to more expensive microphones in the market but my main focus was on the self-noise and ease of use anyway – and I think the capsules sound great too.

I wanted the DIY setup to be light and easy to use so I could put it in to a windshield and just head out to record various things without taking too much equipment with me. Basically this setup is two Røde NT1 (black model) microphones in one custom made body. I don’t expect the build quality and durability to be as top-notch as it is with Røde and other microphone manufacturers but the setup is built really well and I expect it to last for a long time too. If it does not then I can always ask my friend to fix it..haha
 

[tweet_box]How to create your own DIY ORTF stereo mic set up with Pasi Pitkänen[/tweet_box]  

What justified the design and materials? What were the reasons behind the choices made? Did you get your inspiration from other DIY set ups/commercial alternatives?

After watching the DIY Perks video I quickly sketched out a quick mockup of the design in photoshop and sent that to my friend. I was really lucky that my friend was open and willing to try out to do this thing..if he had not then I would not have this DIY setup at all. HUGE thanks to him for that!

The design was built so I could put it inside my Rycote ORTF windshield kit using the Rycote universal studio mount

Of course I wanted to have a high quality setup with as little money as possible. The plan was to use the original capsules and electronics from the Røde NT1 mics and arrange them nicely inside one aluminium body and have the capsules in ORTF configuration. The design was built so I could put it inside my Rycote ORTF windshield kit using the Rycote universal studio mount. The Rycote USM supports microphones up to 55mm in diameter so we made the call to have the aluminium body as 50mm just to be safe.

The body of the microphone is using basic aluminium pipe from the local hardware store combined with some custom metal work done by my great friend. He had the raw material for the milled parts laying around as well. We also decided to 3D print the microphone capsule holders that my friend modeled, which after some iteration turned out great! Of course we used the Røde microphone capsule holders (originally Rycote Lyre design) as a reference. No need to reinvent the wheel.

Then we had to tackle the cable issue and we first tried with normal 5pin XLR plugs but they were too bulky and cumbersome. So we ended up integrating a 5pin miniXLR plug to the body of the mic and also purchased a 50cm long cable that has one 5pin miniXLR plug on the other end and a normal 5pin XLR plug on the other. That did the trick!

To cover the capsules we tried at first to use normal metal mesh and even tea strainer / infusers as a combo, which we quickly found out did not do the job efficiently. We decided to buy aluminium and stainless mesh for the grilles and my friend would then use his own press tools (which I think he even made for this project) to press and mold these high quality grills for the capsules! That guy is a genius!

Overall I learned that it takes A LOT of time and money to make a proper setup. Maybe my perfectionism and nitpicking had something to do with it as well.. haha.

The whole process – in pictures:

 
Pasi Pitkänen captured a series of photos of the whole DIY adventure, and if you want to see the process from start to finish, here it is.


What was the biggest challenge in completing this DIY ORTF Stereo set up?

According to my friend the biggest challenge was to come up with a design that would be manufacturable with his primitive tools. He also had a desire to make the design mass producible. We are not quite there yet though.

For me the biggest challenge was to convey my idea / design to my friend and put it into words. I guess one of the challenges was also to troubleshoot this ground hum that we got in the first prototypes. My friend found out that painted meshes and epoxy didn’t let a galvanic connection to be formed between meshes and main rest of the mechanics so we made changes to the design and the hum was gone.


Popular on A Sound Effect right now - article continues below:


Trending right now:

  • Introducing MOTION GRAPHICS, a complete Motion Graphics sound effects library from SoundMorph!

    Motion Graphics focuses on all the elements you might need for sound design on a trailer, a cinematic scene or a visual that is heavy with motion graphics, whether it be abstract or straight forward, Motion Graphics has all the elements and textures you could think of. Motion Graphics are something all of us sound designers run into at one point or another, so this library is an excellent addition to your sound effects tool box.

    Motion Graphics was created by and in collaboration with sound designer Rostislav Trifonov (SoundMorph Elemental library contributor).

    Motion Graphics features 650 24bit/96 kHz .wav files, all meticulously embedded with Soundminer & Basehead metadata.

    The library features:

    • 450 + designed sound effects
    • 190 + source audio files
    • Whooshes
    • Impacts
    • Risers
    • Stingers
    • Low end and Sub Bass
    • Impulse Responses
    • Passbys
    • Textures – noise, grit, glitch
    • Ambiences
    • Buttons and Clicks
    • Mechanical Elements
    • Granular effects
    91 %
    OFF
  • Modular UI is an advanced user interface library designed by world-renowned sound designer and musician Richard Devine.

    Designed and sourced entirely from Richard Devine’s personal and exclusive Eurorack modular synths and processors collection, the Modular UI soundpack combines the retro, clean sound of analog with the futuristic tech of the new wave of advanced analog and digital synthesis from modular synths, evoking flashbacks of iconic sound design heard in both classic and modern sci-fi films.

    The Modular UI soundpack gives you access to sounds created by one of the masters of modular synths and sound design, and is sourced from equipment that would take a lifetime to purchase and assemble, giving an incredible value to this soundpack both artistically and financially.

    Utilizing many Eurorack modules that have not yet been released to the public and containing samples equally suited to sound designers and electronic musicians alike, Modular UI is in a class by itself!

    91 %
    OFF
  • ⏰ For a very limited time:
    Add this library to the cart and enter ah4launch in the cart coupon field – to sprinkle an extra launch discount, on top of the current discount!

    Animal Hyperrealism Vol IV is a sound library containing animal vocalisations, from real to designed creatures totaling more than 2000 individual sounds in 294 files. The sounds were recorded in zoos, and wildlife centers.

    The asset list includes but is not limited to: hippos, hyenas, vultures, dwarf mongooses, elephants, African cranes, parrots, tigers, pigmy hippos, rhea ostriches, brown bears, pheasants, wildebeests, African wild dogs and many more. The content has been recorded at 192KHz with a Sanken CO100K, an Avisoft CMPA and a Sennheiser 8050 for center plus two Sennheiser MKH8040 for stereo image.

    The resulting ultrasonic spectrum is rich and allows for truly extreme manipulation of the content.

    15 %
    OFF
  • Discover this rich selection of ready-to-use wet motion sounds – perfect for biological / organic mutation sound design, for slimy tentacle creatures or aliens, an ‘adult bedroom scene’ that may require some exaggerated moist sound effects, or any other kind of video game or motion picture production.

    Each audio file is drag-and-drop ready, all presented in 3 formats – high quality MP3 (320 Kbps) and WAV (96 + 44.1 kHz, 24 + 16 Bit) with meticulously labelled keywords, as to create the perfect experience for any audience in a matter of moments!

    So, wether you are looking for a perfect set of sounds for an animal or human tongue licking, snake or tentacles moving / sliding friction, look no further!

    DOWNLOAD WET & SLIMY NOW to instantly turn your project into a true masterpiece!

    PERFECT FOR:

    • Video Games
    • Film / Animation
    • Ads / Trailers
    • YouTube Videos
    • Sound Design
    …and all other audio-visual productions!

    ADDITIONAL BENEFITS:

    • Easy to use, drag and drop ready
    • AAA mixing and mastering
    • High Definition, Standard Quality WAV and High Quality MP3 formats
    • Meticulously labeled and easily searchable files, including keywords/tags
    • FREE Updates to higher versions, FOREVER!

    GET IT NOW for the perfect touch for any app, game, or media project!

    8 %
    OFF

Latest releases:

  • Kawaii UI Bundle is the ultimate bundle for cute user interface sounds.
    In this Bundle you get both volumes of our Kawaii UI libraries.
    Kawaii UI + Kawaii UI 2

    These libraries provide an adorable blend of cute, satisfying interface sounds, crafted to enhance user experience and feedback.
    Bring your games and apps to life with the Kawaii UI Bundle.

    It’s ideal for creating joyful menus, delightful HUDs, playful navigation and notifications, engaging pop-ups, and expressive text.

    Kawaii UI Trailer
    Kawaii UI 2 Trailer

    The source recordings inside are a treasure trove of physical button presses, clicks, pops, taps, mouth sounds, toks, shakers, general synthesised UI sounds, FM bells and telemetry style sounds.. Kawaii UI Bundle provides you with the essential building blocks to craft your own distinctive designs.  Combining these elements gives sound designers a robust sonic palette to create new UI sounds.

    13 %
    OFF
  • Vegetation Footsteps is a detailed collection of footwear and movement variations recorded on dry leaves and forest floor textures. Featuring walk, run, sprint, scuff, pivot, and single step actions, this library captures the nuanced crunch and rustle of layered vegetation underfoot. With performances in sport shoes, sandals, leather shoes, high heels, and barefoot, each sound is designed for realistic character movement across natural environments. Ideal for games, film, and animation, Vegetation Footsteps offers clean, focused assets for building immersive terrain interaction.

  • A collection of 135 potion sound effects.

  • A collection of 140 individual power up ability sound effects.

  • A collection of 103 bowling sound effects.

Need specific sound effects? Try a search below:


Would you recommend this project for an electrical novice?

I think my friend agrees with me when I say that it took time, blood, sweat and even tears to make this DIY setup. Since we decided to use the original electronics I guess the main learnings for him were to learn to make the body of the microphone, learn how to press high quality metal mesh grills etc.

If you know a friend who is up for taking this challenge then of course go at it! Personally I would not take the challenge of learning all these new things. It would take forever and I would lose interest in the whole project.. haha.
 

Do you have any sound examples recorded with this set up? Did you make a comparative recording between your setup and any other ORTF alternative?

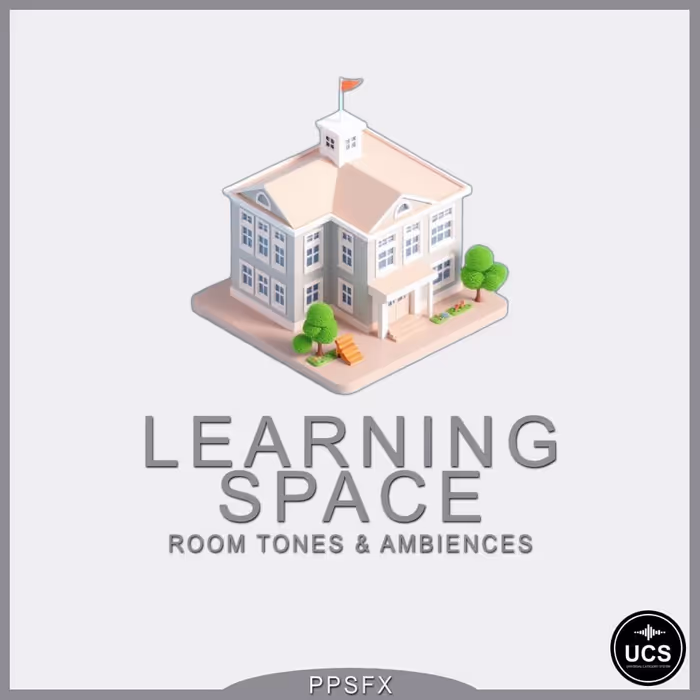
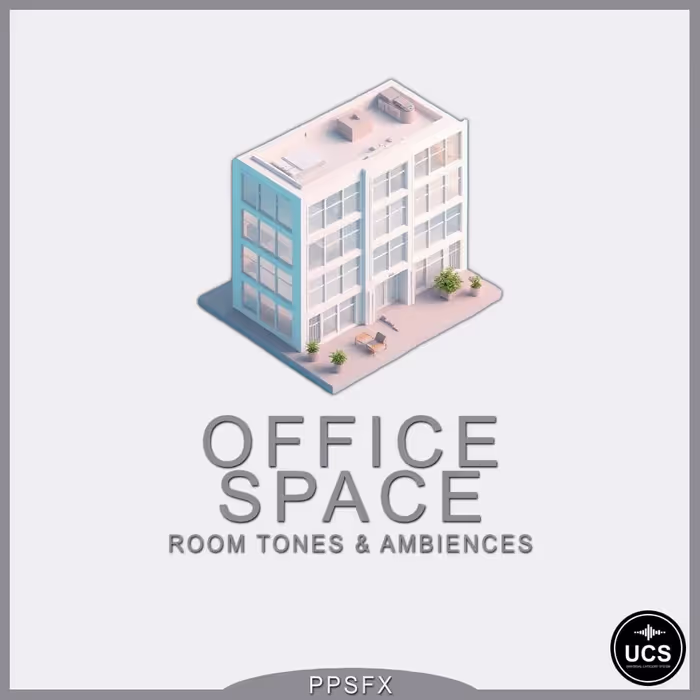
I do have two room tone sound effect libraries that I have recorded using this setup already, called Office Space and Learning Space. Both of them have audio demos on the product page so definitely give them a listen! I was so happy with the results this DIY setup so I did make a quick comparison with my Sennheiser MKH8040’s just to see how big of a difference there is in self-noise. It was a really noticeable difference.
 

Fruits of the labour:

Pasi Pitkänen has recorded two libraries with his DIY microphone setup:

  • Roomtones Learning Space Play Track 23 sounds included, 69 mins total $20

    Learning Space is the go-to collection for clean and constant school environment room tones and ambiences

    Learning Space has over 1 hour / 2.2 GB worth of material that covers a whole large air-conditioned modern school building and also a small air-conditionless old abandoned school building. The length of the room tones are around 3 minutes and all the room tones are calibrated to -30 LUFS.

    The whole library was recorded with a custom designed very low self-noise (4.5 dB) ORTF rig that gives you only the noise of the room and minimal noise from the recording equipment itself.

    The variety in the sounds of the room tones gives you a great palette to experiment with various sound design tools so you can create e.g. spaceship ambiences, drones and otherworldly textures.

    You get the sounds in two formats: 96 kHz, 24 bit and in 44.1 KHz, 16 bit, for more convenient ways of utilizing the sounds in games and other media.

    Room tones / locations:

    Abandoned School Hallway • Abandoned School Kitchen • Abandoned School Large Classroom • Abandoned School Small Classroom • Boiler Room • Cleaning Closet • Gym Hall • Hallway • Kitchen • Large Classroom • Lobby • Locker Room • Small Classroom • Small Gym Storage Room • Small Storage Room • Teacher Lounge Toilet • Teacher Lounge • Toilet • Vestibule

  • Roomtones Office Space Play Track 134 sounds included, 360 mins total $39

    Office Space is an extensive and the go-to collection for clean and constant office environment room tones and ambiences. The library has over 6 hours / 11.7 GB worth of material that covers a whole large modern office building from top to bottom. The length of each room tone is 3 minutes and all the room tones are calibrated to -30 LUFS.

    Office Space was recorded with a custom designed very low self-noise (4.5 dB) ORTF rig that gives you only the noise of the room and minimal noise from the recording equipment itself.

    The huge variety in the sounds of the room tones gives you a great palette to experiment with various sound design tools so you can create e.g. spaceship ambiences, drones and otherworldly textures.

    You get the sounds in two formats: 96 kHz, 24 bit and in 44.1 KHz, 16 bit, for more convenient ways of utilizing the sounds in games and other media.

    Room tones / locations:

    Auditorium • Bunker Shelter • Cleaning Closet • Communal Kitchen • Corridor • Elevator Interior • Elevator Lobby • Gaming Area • General Open Office Area • General Open Office Printer Area • Hallway • Large Meeting Room • Large Room • Large Storage Room • Large Vestibule • Lobby • Lounge • Main Lobby • Massage Room • Meeting Room Lounge Area • Parking Garage • Printer Room • Recycling Room • Restaurant Corridor • Restaurant General Dining Area • Restaurant Kitchen • Restaurant Service Cashier Desk • Sauna • Sauna Changing Room • Sauna Lounge Area • Sauna Shower Area • Server Room • Small Cleaning Closet • Small Communal Kitchen • Small Kitchen • Small Meeting Room • Small Phone Booth Room • Small Room • Small Shower • Small Vestibule • Staircase • Storage Room • Toilet

    Bonus content:

    As bonus content you will get over 20 minutes worth of recordings of an elevator and a large office printer. The bonus content was recorded in both XY and ORTF so you can easily mix and match them to your projects.

    Elevator Door Open Close (Interior and Lobby perspectives) • Elevator Interior Move Up Down Ground Floor to 4th Floor • Office Printer Paper Tray Open Close • Office Printer Print Start Loop End • Office Printer Scan Glass Start Loop End • Office Printer Scan Paper Holder Start Loop End • Office Printer Wake Up From Sleep Mode


What other DIY projects do you have under your belt, and are you working on any other DIY project at the moment?

I have this binaural rig that I need to finish some day. It is this really low budget DIY setup that I put together from a plastic pipe, two round thick wood panels and silicone ears that I bought from a acupuncture webshop. The mics that I plan to put inside the ears are the Clippy Stereo EM172 ones that I bought from micbooster.com. The plan is to use this setup inside the Rycote ORTF windshield so I get great wind protection as well.

I think that’s all folks! If you managed to read this far I humbly thank you for reading! You can find me on Twitter rambling about game audio and sound design if you are interested in that sort of stuff.


Big thanks to Pasi Pitkänen for sharing his DIY experience!


Please share this:


THE WORLD’S EASIEST WAY TO GET INDEPENDENT SOUND EFFECTS:
 
A Sound Effect gives you easy access to an absolutely huge sound effects catalog from a myriad of independent sound creators, all covered by one license agreement - a few highlights:

  • Environments & Ambiences Suburban Russia Play Track 56 sounds included, 173 mins total $19

    What could be better than summertime in the country?

    Of course summertime in Russian village!

    Those sweet sounds of hammers, lawnmowers, dogs, neighbors activity, forests, fields, rain and, of course, lots of cicadas!

    This library contains authentic atmospheres of villages and small towns of suburban Moscow, as well as sounds of nature, roomtones and doors of the old Dacha from Soviet era.

    KEY POINTS:

    • Authentic atmospheres of dacha, forests, fields, streams, rains, streets of small towns, night and day suburban activity and roomtones!

    • An excellent addition to your library for film, TV and multimedia – Suburban Russia during summer and autumn time

    • Recorded with Mid-Side Sennheiser MKH8040/MKH30 combo

    • Sorted by location-type categories

    • All files have metadata included

  • Introducing MOTION GRAPHICS, a complete Motion Graphics sound effects library from SoundMorph!

    Motion Graphics focuses on all the elements you might need for sound design on a trailer, a cinematic scene or a visual that is heavy with motion graphics, whether it be abstract or straight forward, Motion Graphics has all the elements and textures you could think of. Motion Graphics are something all of us sound designers run into at one point or another, so this library is an excellent addition to your sound effects tool box.

    Motion Graphics was created by and in collaboration with sound designer Rostislav Trifonov (SoundMorph Elemental library contributor).

    Motion Graphics features 650 24bit/96 kHz .wav files, all meticulously embedded with Soundminer & Basehead metadata.

    The library features:

    • 450 + designed sound effects
    • 190 + source audio files
    • Whooshes
    • Impacts
    • Risers
    • Stingers
    • Low end and Sub Bass
    • Impulse Responses
    • Passbys
    • Textures – noise, grit, glitch
    • Ambiences
    • Buttons and Clicks
    • Mechanical Elements
    • Granular effects
    91 %
    OFF
  • Modular UI is an advanced user interface library designed by world-renowned sound designer and musician Richard Devine.

    Designed and sourced entirely from Richard Devine’s personal and exclusive Eurorack modular synths and processors collection, the Modular UI soundpack combines the retro, clean sound of analog with the futuristic tech of the new wave of advanced analog and digital synthesis from modular synths, evoking flashbacks of iconic sound design heard in both classic and modern sci-fi films.

    The Modular UI soundpack gives you access to sounds created by one of the masters of modular synths and sound design, and is sourced from equipment that would take a lifetime to purchase and assemble, giving an incredible value to this soundpack both artistically and financially.

    Utilizing many Eurorack modules that have not yet been released to the public and containing samples equally suited to sound designers and electronic musicians alike, Modular UI is in a class by itself!

    91 %
    OFF
Explore the full, unique collection here

Latest sound effects libraries:
 
  • Kawaii UI Bundle is the ultimate bundle for cute user interface sounds.
    In this Bundle you get both volumes of our Kawaii UI libraries.
    Kawaii UI + Kawaii UI 2

    These libraries provide an adorable blend of cute, satisfying interface sounds, crafted to enhance user experience and feedback.
    Bring your games and apps to life with the Kawaii UI Bundle.

    It’s ideal for creating joyful menus, delightful HUDs, playful navigation and notifications, engaging pop-ups, and expressive text.

    Kawaii UI Trailer
    Kawaii UI 2 Trailer

    The source recordings inside are a treasure trove of physical button presses, clicks, pops, taps, mouth sounds, toks, shakers, general synthesised UI sounds, FM bells and telemetry style sounds.. Kawaii UI Bundle provides you with the essential building blocks to craft your own distinctive designs.  Combining these elements gives sound designers a robust sonic palette to create new UI sounds.

    13 %
    OFF
  • Vegetation Footsteps is a detailed collection of footwear and movement variations recorded on dry leaves and forest floor textures. Featuring walk, run, sprint, scuff, pivot, and single step actions, this library captures the nuanced crunch and rustle of layered vegetation underfoot. With performances in sport shoes, sandals, leather shoes, high heels, and barefoot, each sound is designed for realistic character movement across natural environments. Ideal for games, film, and animation, Vegetation Footsteps offers clean, focused assets for building immersive terrain interaction.

  • A collection of 135 potion sound effects.

  • A collection of 140 individual power up ability sound effects.

  • A collection of 103 bowling sound effects.


Leave a Reply

Your email address will not be published. Required fields are marked *

HTML tags are not allowed.