


In the past few years I’ve seen a ton of professionals switching to REAPER for sound design and dialog work. Asbjoern noticed this as well and asked me to share some tips here on A Sound Effect. So here are my 5 tips for making the most of REAPER, whether you’re just getting started or want to optimize your existing workflow.
1: Fix the file management
Without some care and attention, your projects and associated files can quickly become a confusing mess. File management is vitally important, and REAPER provides complete control over auto backups, file names, peak files, and more, but none of these are set by default.
Briefly, here’s how I have mine set
• Timestamped AutoBackups and ReaPeak files saved to a specific folder (away from project audio)
• Backup frequency is 6min
• Trackname[xx] format for recorded file names.
imported files will be copied to the project folder, which is called ‘Audio Files’ or ‘Media’ in the same place as the project file.
• Temp files (old backup and peaks) cleaned if older than 7 days via nightly scheduled Automator script
For details check out this article on Reaper File management.
2: Optimize zooming and scrolling
When working in a DAW you have a mouse in your hand for 90% of it. The way you move around the project needs to be intuitive and effortless.
The defaults for zooming and scrolling in REAPER make absolutely no sense to me. Mouse wheel to zoom makes sense in a realtime strategy game, but you’d expect it to scroll up and down the timeline in a DAW. Luckily that’s easy to fix.
Open the action list and filter by ‘mousewheel’ to find everything the mouse wheel can be assigned to. Filter for scroll or zoom and there are even more options. Configure it like your old DAW or whatever else makes the most sense to you. I go into the details of my setup in this video.
3: Use your screensets

Screensets are a fast way to save and load your optimized window positions for any task you’re currently doing. This is a lot like saving window positions in Pro Tools Memory Locations, but these are global and will work for all your projects.
For example, you could have one layout with the just the arrange view and your custom toolbars, a second with the mixer fullscreen, a 3rd with your dialog fx plugins floating. In this video I show the screen sets feature in detail.
4: Get the extensions
What’s an extension? It’s like a plugin for REAPER that adds additional functions such as an envelope LFO generator; startup actions; and marker to bpm conversion tool.
There are two extensions that I consider essential: SWS S&M; and ReaPack.
The previously mentioned features are part of SWS, and it also includes a few hundred more actions that are useful alone or as part of custom actions.
ReaPack is a package manager for REAPER. What that means is it can search for and install package updates automatically.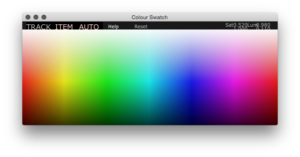
A package could be LUA or EEL script, a JSFX plugin, extensions or other ReaPack compatible thing. If you have no interest in learning to script, ReaPack is a great way to start using them, just install 500+ in one-shot, then use them from the action list. Did I mention that these extensions and scripts are free?
sidebar: Extensions are a collection of functions and compiled code. Scripts are individual tools in non-compiled lua, eel or python code that use REAPER’s API. If a function needs a GUI then extension or script is the way to go.


Some interesting scripts that you can get with ReaPack:
• Airon_Colour Swatch.lua – A nice colour picker for tracks and items
• Breeder_spk77_GlueTools.lua – provides toggles for what happens when gluing items.
• mpl_Randomize Track FX Parameters
Not an extension, but something that’s also really helpful is the VLC media player. Once installed on your system REAPER can use it as a decoder for videos and allows you to import more file formats. If you work with video you’ll need this. Be sure to get the 64-bit installer.
5: Be part of the community
• Make the most of REAPER as a sound design tool – part 1: Getting Started
• Make the most of REAPER as a sound design tool – part 2: Workflow
• Video: How to edit and process field recordings entirely in REAPER
• The Rise of Reaper – with Justin Frankel
• REAPER for Game Audio – Getting Started & Rendering
• Join the REAPER channel on the Sound Community Discord server