


This post is a quick-start guide to help you begin searching and using your sound library in minutes. It focuses on the broad strokes to complete tasks easily and swiftly. Future articles will share extra features, options, and detailed how-to guides.
1. An introduction to Soundly
3. How to Organize Sound Libraries with Soundly
4. How to Find and Use Sound FX Clips with Soundly
5. 5 Killer Features in Soundly
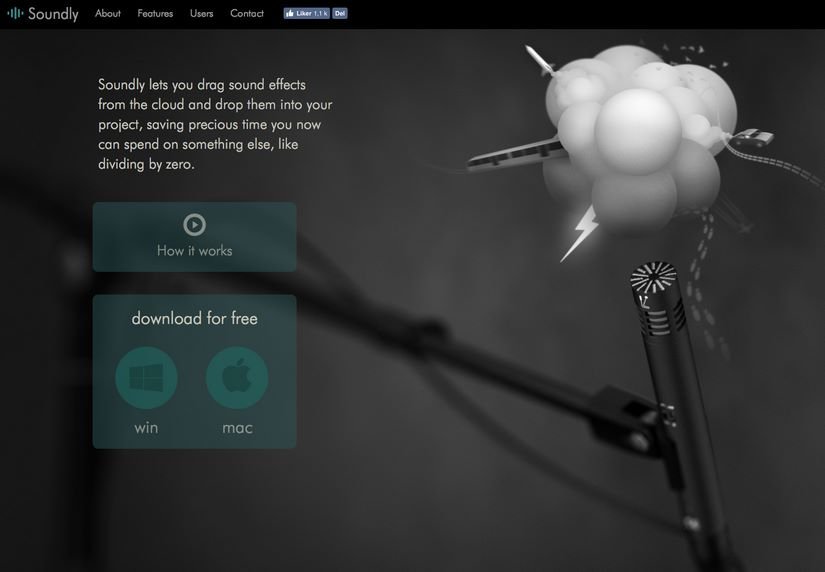
If you want to take Soundly 2 for a spin, download it for free for Windows here, and Mac here.
Installing Soundly
Getting started with Soundly is easy. First, let’s begin by downloading the Soundly app to your computer.
MacOS
Soundly supports MacOS 10.6.8 and later.
- Visit www.getsoundly.com.
- Click the Apple icon beneath the “download for free” text. This will begin downloading the installation app to your default download location on computer.
- Go to your default download location.
- Double click Soundly.dmg. A new window will open.
- Drag and drop the Soundly icon to the Applications folder.
- Go the Applications folder.
- Double click the Soundly icon. This will launch Soundly.
Windows
Soundly supports Windows XP and later.
- Visit www.getsoundly.com.
- Click the Windows icon beneath the “download for free” text. This will begin downloading the installation app to your default download location on computer.
- Go to your default download location.
- Open Soundly-setup.exe.
- Follow the setup wizard and select the destination folder for Soundly.
- Go to destination folder for Soundly.
- Double click the Soundly icon.
Creating a Soundly Account
Soundly isn’t burdened by copy protection schemes. Instead, using the app requires only a simple email account. As soon as you launch Soundly you will be asked to create an account.
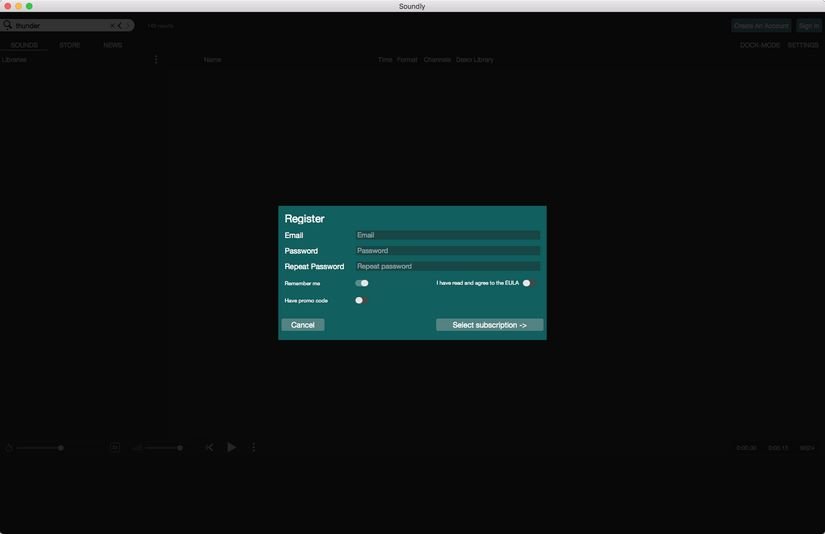
- Open Soundly.
- Click Register.
- Type your email and create a password.
- Click the button next to “I have read and agreed to the EULA.”
- Click Select Subscription. A new page will appear.
- Choose your subscription from the three options: Free, 24hr Pass or Pro Monthly.
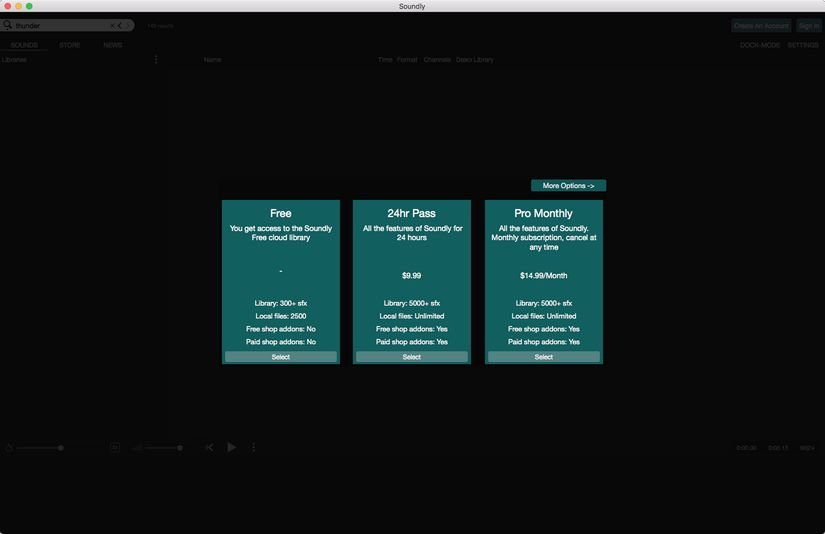
If you have selected a subscription with fee (24hr Pass or Pro Monthly):
- Fill out your Billing details.
- Click Payment.
- Fill out your credit or debit card information.
- Click Purchase.
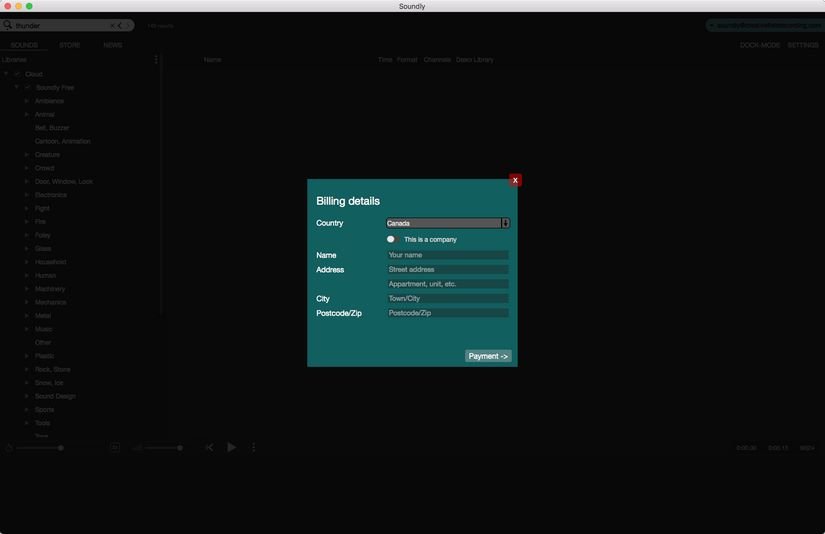
Note: if you have selected Pro Monthly, a monthly fee ($14.99) will be charged to your credit or debit card.
An Introduction to the Soundly Workspace
Once you have created an account, the main Soundly workspace will appear. This is where you will spend most of your time using Soundly.
(There are other areas, such as the Store, News, and Settings pages, which will be discussed in later posts.)
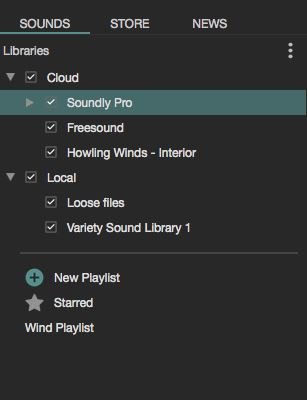
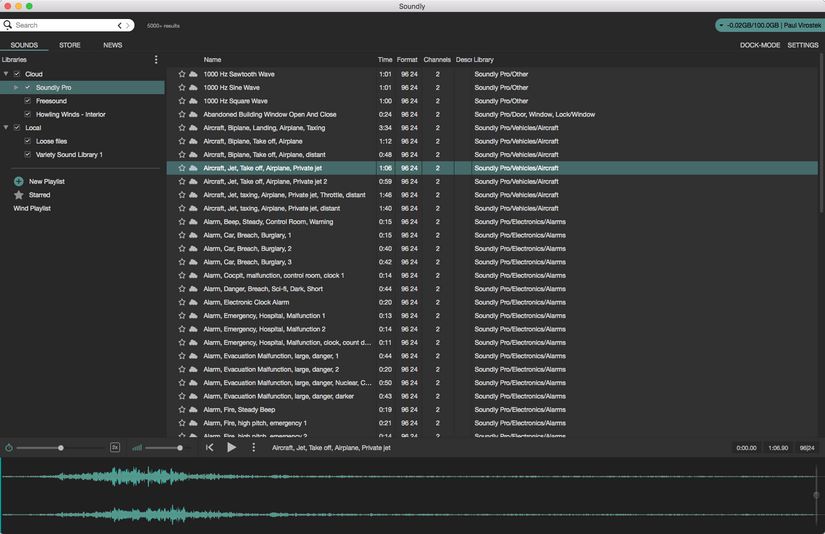
Sound libraries and playlists are shown in the left pane.
This area is used to add and remove sound libraries and folders of sounds, and gather them in playlists or “Starred” favourite lists.
This area is a way to see entire sound collections, clip libraries, and global groups of sounds.
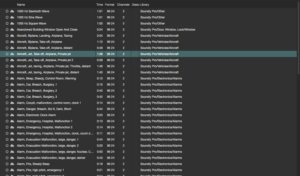
Search results are displayed in the large pane to the right. This shows sounds in a chart view that displays the name, description, and sound stats.

The bottom area presents a selected sound’s waveform, complete with play/stop and rewind transport controls, volume, speed, and selected sound file stats.

The window can also be organized in “Dock-Mode.” This presents all panes organized left-to-right at the base of the OS desktop. This is a helpful way of saving screen space. It is also a valuable way to allow Soundly and editing apps to work side-by-side.
Adding Sound Libraries to Soundly
The easiest way to add sound libraries to Soundly is to simply drag and drop them on the main Soundly window.
- Select a folder of sound files from a hard drive.
- Drag and drop the folder onto the main Soundly browsing window. A new window will appear.
- Release the folder on the Local area of the window. A new window will appear.
- Click Import. The files will be indexed and added.
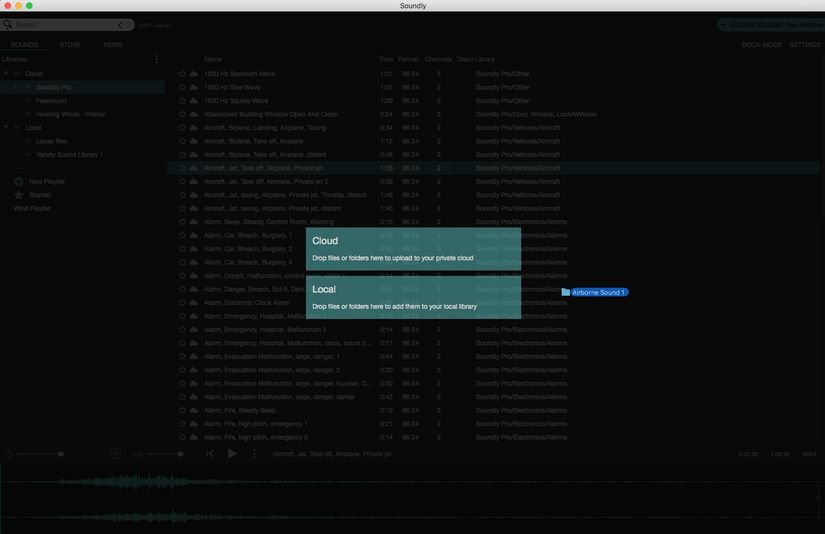
That’s it! The files will be added to Soundly. You can find them by clicking the arrow to the left of Local in the left pane, then clicking the name of the sound library. This will display all sounds from that folder.
Finding Sound FX in Soundly
How can you find the clips you need? The easiest way to find sound fx is:
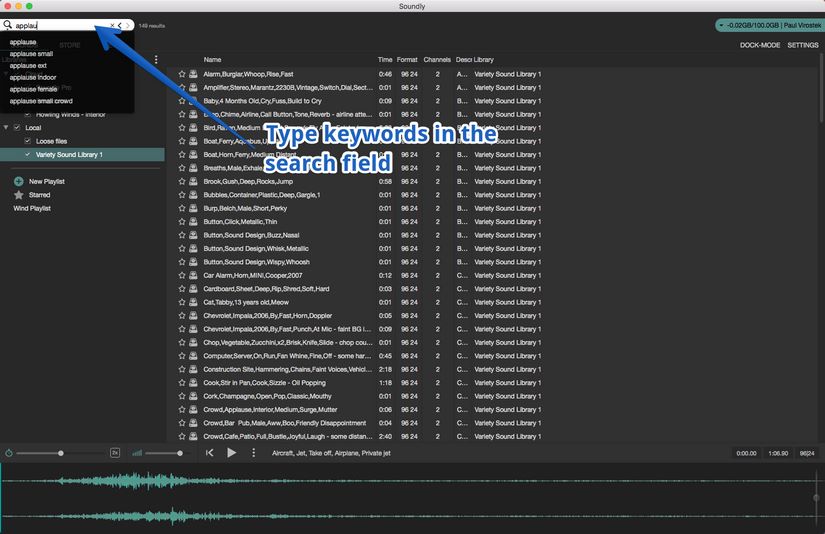
- Click the white field next to the magnifying glass in the upper left of the main window.
- Type keywords for the sound you want to find.
- Press the return key. Results will be displayed in the right pane.
Auditioning Sound Clips in Soundly
Soundly has powerful tools to play and manipulate clips. The simplest way to listen to clips is to click on a row in the search results. The sound will begin playing immediately. Press spacebar to stop and restart playback.
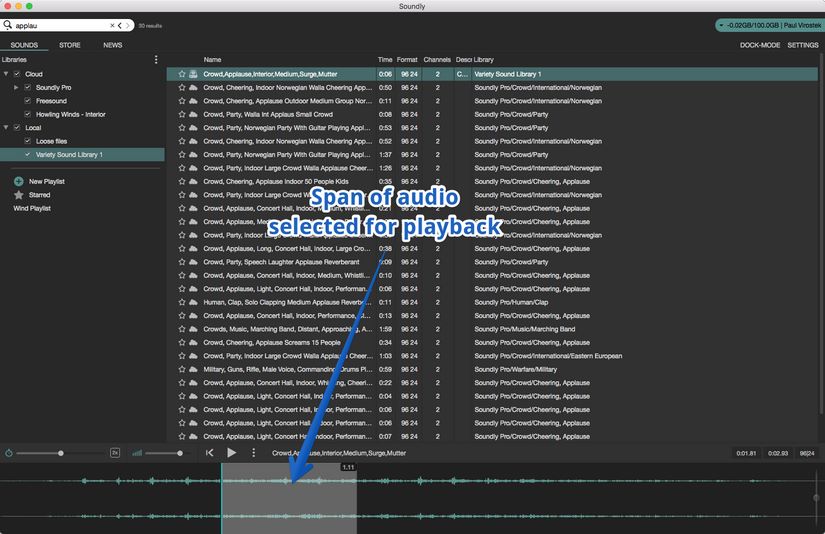
Soundly also allows playback of a portion of a sound. Simply drag the mouse cursor across an area of the sound waveform. This will highlight the area that will be played. Press spacebar to begin playback of just this section of the whole sound clip.
Transferring Sound
Once you have found a clip you like, you can transfer it to other apps, such as video editing apps, desktop folders, or sound editing apps. Here’s how:
- Select the sound you want in the right pane of the search results.
- Select the part of the sound you want to transfer.
- To transfer the whole sound, type CMD/CTRL+a to select it all.
- To transfer part of a sound, drag across a portion of the sound to highlight the area you’d like to transfer.
- Click and hold the selected area.
- Drag the selection into the destination app or another folder. The sound or clip will be copied and placed in the app or folder.
And that’s it! Those are the basics to begin using Soundly to add and find sounds and transfer and use them in other apps.
Stay tuned for future articles that explore these and other features in detail.
for Windows here, and Mac here.